
How to Install Flexible Thin Stone on Exterior Walls: A Professional Guide to Thin Stone Veneer Walls
Introduction: A Great Stone Wall Starts with the Right Installation
Flexible thin stone has become a popular choice for homeowners, builders, architects, and commercial contractors who want the natural beauty of stone without the weight and installation challenges of traditional stone cladding.
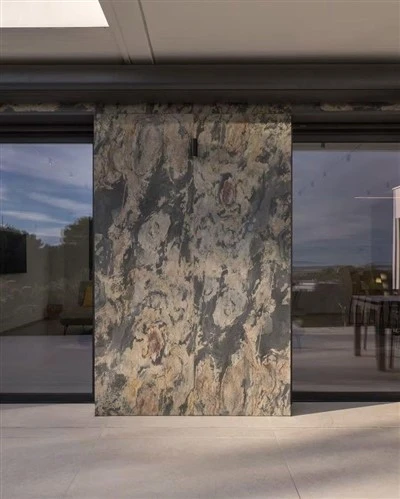
From modern house facades and outdoor kitchens to hotel entrances, garden walls, and commercial buildings, flexible thin stone offers an attractive way to create a natural stone finish with a relatively thin, lightweight material.
However, there is one thing we always tell our customers: a good-looking stone veneer is only half the job. Proper surface preparation, compatible adhesive, correct installation, and weather protection are what help the finished wall last.
When installing Thin Stone Veneer Walls on exterior surfaces, small mistakes can lead to much bigger problems later. Applying the wrong adhesive, allowing the back coating to dry in direct sunlight, leaving air pockets behind the stone, or failing to seal exposed top edges can all increase the risk of debonding and water penetration.
The good news is that these problems can often be avoided by following a clear installation procedure.
In this guide, we will walk through the five main installation steps, explain the materials and tools involved, and share practical advice for exterior projects. Whether you are a professional installer, a building contractor, a distributor, or a homeowner planning a renovation, this guide will help you understand what matters most before starting the job.
What Is Flexible Thin Stone Veneer?
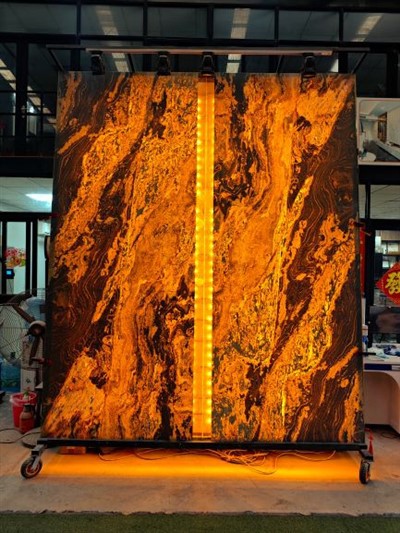
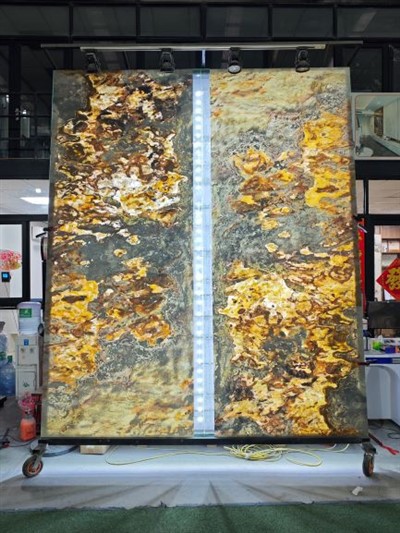
Flexible thin stone veneer is a thin decorative stone material designed to provide the appearance and texture of natural stone without the bulk of conventional stone slabs or masonry units.
Depending on the product, it may consist of a thin natural stone facing supported by a flexible backing or reinforcement system. Some products are designed to bend around gentle curves, while others are better suited to flat walls and carefully detailed corners.
Before ordering materials, always check the actual product construction. Not every thin stone product has the same flexibility, thickness, backing material, or installation requirements.
Typical Material Specifications
The following figures are general reference ranges, not guaranteed specifications for every product. Always confirm the technical data sheet supplied by your manufacturer.
| Item | Typical reference | What to check |
|---|---|---|
| Stone veneer thickness | Approximately 1.5–3 mm for some ultra-thin products | Confirm actual stone and backing construction |
| Tile adhesive | C2-grade cementitious adhesive or higher, where specified | Verify exterior suitability and compatibility |
| Trowel notch | Around 6–10 mm for some installation systems | Match the notch to the substrate and product |
| Primer drying time | Often 2–3 hours in the supplied installation procedure | Follow the primer manufacturer's instructions |
| Adhesive coverage | Full-bed contact is required | Check for voids and confirm the specified coverage |
| Working temperature | Product-specific | Follow the adhesive, primer, and veneer limits |
Why does this matter? A lightweight veneer still depends on a reliable bond. The thinner the material, the more important it becomes to achieve consistent support without damaging the surface during installation.
How to Prepare for Installing Thin Stone Veneer on Exterior Walls
Before opening the adhesive, take time to inspect the wall and confirm that all materials are suitable for the project.
A few minutes spent checking the substrate can save hours of repair work later.
1. Check the Wall Substrate
The substrate should be flat, solid, dry enough for the specified installation system, clean, and free of loose material.
Remove dust, oil, paint that is not firmly bonded, loose mortar, and other contaminants that could interfere with adhesion.
For concrete or masonry walls, repair weak or uneven areas before installing the veneer. For framed exterior walls, make sure the selected backing board and waterproofing assembly are approved for the intended cladding system.
Do not assume that any painted wall, cement board, or existing exterior finish can accept direct bonding. Check the substrate manufacturer's requirements and the veneer supplier's installation instructions.
2. Choose an Exterior-Rated Adhesive
For many compatible thin stone systems, a high-performance cementitious tile adhesive meeting C2 classification under EN 12004 may be specified. Depending on the product and exposure conditions, a deformable adhesive classification such as S1 or S2 may also be relevant.
However, an adhesive classification alone does not prove that a particular adhesive is suitable for every flexible stone product.
Ask your supplier to confirm compatibility between the stone backing, primer, adhesive, and substrate. For demanding exterior installations, request written technical guidance rather than relying on a general-purpose construction adhesive.
Never substitute a structural adhesive or an untested bonding product simply because it appears strong. The complete installation system must be suitable for the intended application.
3. Prepare the Necessary Tools
A typical installation kit may include:
A paint roller or suitable brush for the back coating.
A notched trowel.
Protective gloves and other required personal protective equipment.
A suitable vibration pad or approved compacting tool.
A sponge and clean water for residue removal.
Suitable tools and compatible materials for sealing exposed edges and terminations.
For larger projects, a small test installation is a sensible step. It helps confirm the appearance, working time, bond, and installation technique before the crew covers a large wall.
Step-by-Step Guide: How to Install Flexible Thin Stone on Exterior Walls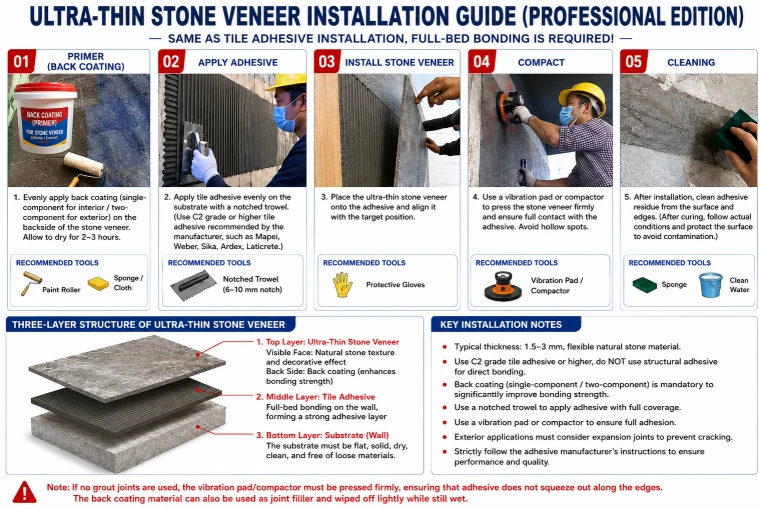
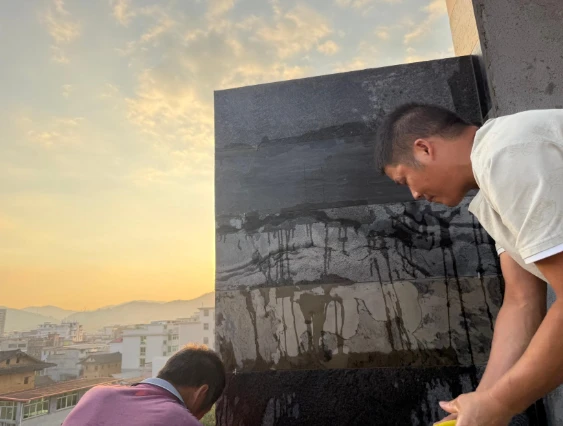
Step 1: Apply Primer or Back Coating to the Stone Veneer
Back coating is one of the most important steps in the installation procedure. It helps prepare the back of the veneer for bonding when the product and primer are designed to be used together.
Apply the specified back coating evenly with a roller or brush. Avoid missed areas, heavy puddles, and uneven buildup.
Some systems use a single-component primer, while others require a two-component product. The correct choice depends on the stone backing and the manufacturer's instructions.
Keep Primed Stone Out of Direct Sunlight
This is a point worth emphasizing, especially on exterior projects in hot climates.
After applying primer or back coating, do not leave the stone veneer exposed to direct sunlight.
Direct sun and high surface temperatures can cause the coating to dry too quickly, potentially affecting the bonding process. Wind and hot, dry conditions can also shorten the usable working window.
Keep the primed sheets in a shaded, clean, protected area until they are ready for installation. Do not place them face down on dirty ground or stack them in a way that damages the treated surface.
Follow the specified drying time, which may be around 2–3 hours for some systems, but do not treat that figure as universal. Temperature, humidity, airflow, and the particular primer all affect drying.
If a primed sheet has been left in strong sunlight for an extended period, do not simply assume it is ready to install. Check the manufacturer's guidance and, if necessary, test the bond before proceeding.
For contractors working on large facades, preparing manageable batches is often safer than priming the entire order at once.
Step 2: Apply Tile Adhesive to the Wall
Once the substrate is ready and the back coating has reached the required condition, apply the approved adhesive to the wall.
Use a notched trowel to spread the adhesive evenly. A 6–10 mm notch may be suitable for some systems, but the correct notch depends on the substrate, veneer backing, adhesive, and installation method.
The objective is full-bed bonding, not simply sticking the sheet to a few lines of adhesive.
Comb the adhesive in consistent, straight ridges. Avoid circular patterns or irregular application that can trap air and make it difficult to achieve uniform contact.
Work in manageable sections. If the adhesive begins to skin over before the veneer is installed, remove and replace it according to the adhesive manufacturer's instructions rather than trying to force a bond.
For hot-weather projects, keep an eye on the wall temperature and the adhesive's open time. A wall that feels warm to the touch may already be creating a more demanding installation environment.
Why Full-Bed Bonding Matters
Full-bed contact helps distribute support across the back of the veneer and reduces the risk of hollow areas.
Voids can become weak points where impact, temperature changes, or moisture-related stresses contribute to local failure. On exterior walls, the consequences can extend beyond appearance, particularly if water enters through poorly detailed edges or openings.
Use the adhesive manufacturer's stated coverage requirements and verify the result during installation.
Step 3: Position the Flexible Thin Stone Veneer
Carefully place the veneer onto the fresh adhesive. Align it with your reference lines and adjust its position while the adhesive remains workable.
Start from a clearly established layout line so that the courses, joints, and overall pattern remain consistent.
Do not rely on the flexibility of the material to hide a badly prepared wall. Flexible stone can follow gentle curves when the product is designed for them, but excessive bending, twisting, or stretching may damage the backing or distort the finished appearance.
For exterior projects, pay particular attention to corners, window openings, door frames, and transitions between different wall materials.
Keep joints consistent with the selected system. Where the design calls for grout joints, use the specified joint width and compatible grout or jointing material.
Where a no-grout-joint finish is permitted, take extra care with alignment and edge detailing. A tight-looking joint does not automatically provide a weatherproof seal.
Step 4: Compact the Veneer for Firm Adhesion
After positioning the veneer, use a suitable vibration pad or approved compacting tool to press it firmly into the adhesive.
The aim is to improve contact between the veneer backing and the adhesive bed without damaging the thin stone surface.
Move the tool evenly across the surface. Avoid concentrating excessive pressure in one spot or using equipment that may crack the stone, distort the backing, or leave visible marks.
On the initial installation, periodically lift a sample piece while the adhesive is fresh to check the actual contact pattern. This is a practical way to see whether the trowel ridges are collapsing properly and whether the adhesive is reaching the required coverage.
If the back of the veneer shows significant unbonded areas, correct the installation technique before proceeding with the rest of the wall.
Do Not Leave Hollow Areas Behind the Veneer
Hollow spots can indicate insufficient adhesive contact, an uneven substrate, or adhesive that has skinned over.
These issues should be corrected while the adhesive is still workable. Once the material has cured, removing a poorly bonded sheet can become much more difficult.
For large commercial projects, consider recording periodic coverage checks as part of the installation quality-control process.
Step 5: Clean the Surface and Seal Exposed Edges
Once the veneer has been positioned and compacted, remove adhesive residue using the method recommended by the material manufacturer.
Use a clean sponge and suitable water management. Avoid flooding the joints or disturbing the veneer before the adhesive has developed sufficient strength.
Do not wait until hardened adhesive becomes difficult to remove, but also avoid aggressive scrubbing that can damage the natural stone surface.
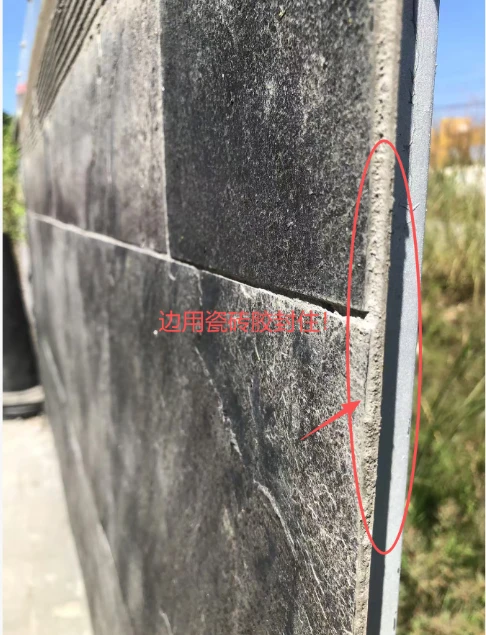
Seal the Top Edge and Exposed Perimeter
This step is especially important for exterior applications.
Use a compatible exterior-grade tile adhesive to seal the exposed top edge and required perimeter edges of the stone veneer, following the approved system details.
Make sure the top termination and cut edges are properly protected against water entry.
Pay particular attention to:
The top edge of a feature wall.
Exposed vertical sides.
Cut edges around windows and doors.
Transitions to other cladding materials.
Areas beneath projecting caps, sills, and roof overhangs.
Edge sealing helps reduce the chance of water entering behind the veneer. However, adhesive edge sealing should not be treated as a replacement for proper flashing, waterproofing, drainage, or movement joints.
At horizontal projections and wall tops, use suitable caps, flashings, and drips where required to direct water away from the wall assembly. Follow the approved detail for the specific building and cladding system.
If the design includes movement joints, keep them functional. Do not fill a movement joint with rigid adhesive when the specified detail requires a flexible sealant or another movement-accommodating component.
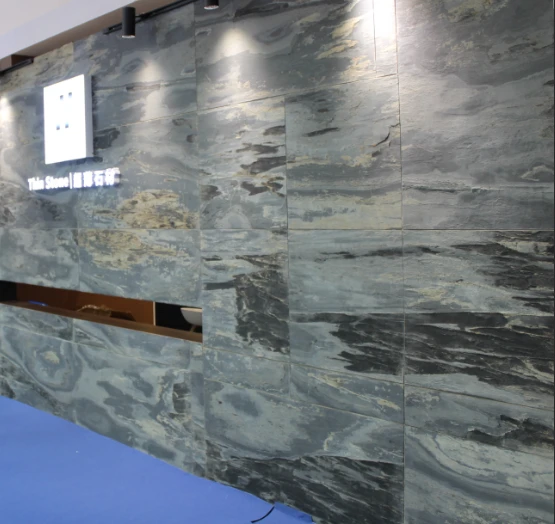
Important Exterior Installation Details That Are Easy to Miss
Protect the Wall Against Water
A stone finish is not automatically a complete waterproofing system.
Water can enter around windows, penetrations, roof intersections, wall tops, and poorly sealed terminations. Depending on the construction, a continuous water-resistive barrier and suitable drainage provisions may be required behind the exterior veneer.
For framed walls, check the applicable wall assembly requirements before installing the stone. Confirm how the weather-resistive barrier, flashing, drainage path, and veneer work together.
The relevant building code and approved construction details take precedence over a generic installation guide.
Allow for Temperature Changes
Exterior walls expand and contract as temperatures change. Materials can also respond differently to moisture and movement.
For this reason, movement joints should be planned in accordance with the substrate, wall layout, exposure, and applicable installation standards.
Do not assume that a flexible veneer eliminates the need for movement joints. Flexibility in the decorative material does not remove movement from the underlying building.
Plan for Weather Before Starting
Avoid installation outside the permitted temperature range or when rain, frost, strong wind, or intense heat could interfere with bonding and curing.
Freshly installed veneer may need temporary protection from rain and direct sunlight, depending on the products being used.
On a large exterior facade, it is often better to divide the work into smaller sections that the crew can complete and protect properly in the available weather window.
Flexible Thin Stone vs. Traditional Stone Veneer
Both products can create an attractive natural stone appearance, but they serve different purposes.
| Comparison | Flexible thin stone veneer | Traditional stone veneer |
|---|---|---|
| Material thickness | Often much thinner; product-specific | Generally thicker |
| Weight | Usually lighter | Usually heavier |
| Handling | Often easier to transport and position | May require more substantial handling |
| Curved surfaces | Some products accommodate gentle curves | Typically more limited without special pieces |
| Installation | Requires careful backing, adhesive, and edge detailing | May use adhered or mechanically supported systems |
| Substrate requirements | Depends on the specific product and wall assembly | Depends on weight and veneer system |
| Repair | Local repair may be possible but can be difficult to color-match | Individual pieces may be replaceable, depending on the system |
| Exterior suitability | Must be confirmed for the selected product | Must be confirmed for the selected product and installation method |
The main advantage of flexible thin stone is that it can offer a natural stone finish without the bulk of conventional stone. It can be particularly useful for renovation projects where weight, access, or surface geometry matters.
Traditional stone veneer may be a better choice when the project requires a thicker profile, deeper relief, or a specific masonry appearance.
There is no single best option for every job. The right choice depends on the design, substrate, exposure, budget, installation requirements, and expected service life.
What Should You Ask a Flexible Thin Stone Veneer Manufacturer?
If you are purchasing material for a commercial project or sourcing products for distribution, do not compare suppliers on appearance and price alone.
A reliable flexible thin stone veneer manufacturer should be able to explain the product construction, recommended primer, compatible adhesive, installation procedure, and limitations for exterior use.
Before placing an order, ask for:
A current technical data sheet.
A detailed installation guide.
The recommended back coating and adhesive specifications.
Written confirmation of suitability for the intended exterior application.
Relevant test reports and performance documentation.
Packaging, storage, and transportation instructions.
Batch identification and quality-control information.
Details of recommended edge treatments, movement joints, and weatherproofing interfaces.
If you are sourcing from a thin stone veneer factory, ask whether the factory can support your required thickness, stone appearance, sheet dimensions, backing construction, packaging, and order quantity.
For wholesale buyers, consistent production quality and clear technical documentation can be just as important as the quoted unit price.
If the project involves a coastal environment, freeze-thaw exposure, high wind loads, or a large commercial facade, request additional technical guidance before approving the material.
Building Codes and Exterior Wall Compliance
Exterior stone veneer installations must meet the requirements applicable to the project location and building type.
the International Building Code and International Residential Code provide relevant provisions for exterior wall weather protection, flashing, water-resistive barriers, and drainage. Local jurisdictions may adopt different editions or amendments.
For example, the 2024 International Residential Code addresses water-resistive barriers and exterior wall water management in Section R703.2, while exterior wall requirements in the International Building Code include provisions for weather protection and flashing.
The exact requirements depend on the approved assembly, the building's construction type, its height, the climate, and the locally adopted code.
Before installation, confirm:
Whether the proposed veneer system is approved for the intended exterior wall.
Whether the substrate and backing meet the system requirements.
Whether flashing and water-resistive barriers are required.
Whether the proposed assembly satisfies applicable fire, wind, and other project-specific requirements.
Whether the project requires testing, engineering approval, or additional documentation.
Do not assume that a thin, lightweight stone finish is exempt from building regulations simply because it weighs less than traditional stone.
For larger buildings, public projects, and multi-story facades, the design professional and local building authority should confirm the approved wall assembly.
Common Installation Mistakes and How to Avoid Them
Even a high-quality product can fail when basic installation details are overlooked.
| Common mistake | Potential result | Better practice |
|---|---|---|
| Leaving primed veneer in direct sunlight | Premature drying or compromised bonding conditions | Store primed material in a shaded, protected area |
| Using incompatible adhesive | Weak bond or premature debonding | Confirm compatibility with the veneer and substrate |
| Applying adhesive unevenly | Hollow areas and inconsistent support | Use the specified notched trowel and check coverage |
| Installing over a dirty or weak wall | Adhesion failure | Prepare and repair the substrate first |
| Applying veneer after adhesive skins over | Reduced contact and bond strength | Work in manageable sections |
| Leaving top edges exposed | Increased risk of water entry | Detail top terminations, caps, and edge seals correctly |
| Ignoring movement joints | Cracking or localized separation | Follow the approved joint layout |
| Cleaning too late or too aggressively | Hardened residue or surface damage | Clean at the appropriate stage using the specified method |
The lesson is straightforward: good installation is not about using more adhesive or pressing harder. It is about using compatible materials, following the correct sequence, and checking the work as you go.
Industry Trends: Why Lightweight Stone Cladding Is Gaining Attention
Architects and contractors continue to look for exterior finishes that combine natural appearance with practical handling and installation.
Lightweight stone products can help simplify material transport, reduce handling demands, and offer more flexibility in certain renovation and decorative applications.
They are also attractive to distributors and building-material suppliers who want to offer natural stone aesthetics across different project types, from residential facades to retail spaces and hospitality interiors.
At the same time, the market is placing greater emphasis on verified performance, reliable documentation, weather resistance, and installation consistency.
For a professional buyer, the important question is no longer just whether the stone looks good in a sample. It is whether the entire system can perform as intended under the project's actual conditions.
That means evaluating the stone, backing, primer, adhesive, substrate, edge details, and weatherproofing as connected parts of one installation.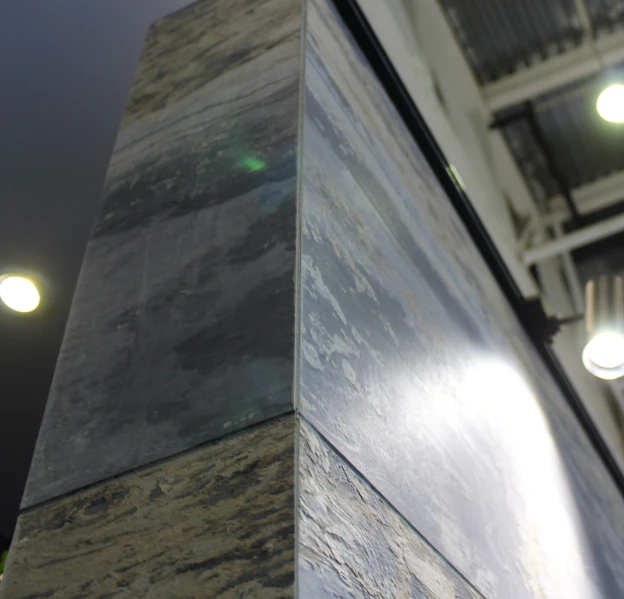
Final Thoughts: A Reliable Installation Begins Before the First Sheet Goes on the Wall
Installing Thin Stone Veneer Walls successfully is about getting the details right from the beginning.
Prepare a sound substrate, apply the correct back coating, protect primed veneer from direct sunlight, use a compatible exterior-rated adhesive, achieve full-bed bonding, compact the material evenly, and clean the surface at the right time.
Most importantly, do not overlook the exposed top and perimeter edges. Proper edge protection, flashing, and drainage details are essential parts of an exterior installation.
If you are selecting a product for an upcoming project, ask your supplier for the technical data and a complete installation recommendation before ordering. A short conversation at the beginning can prevent expensive problems later.
For contractors, distributors, and project buyers, choosing a manufacturer that understands both the material and the installation process makes it easier to deliver a consistent finish and set realistic expectations for the job.
Frequently Asked Questions About Flexible Thin Stone Veneer Installation
1. How do you install flexible thin stone veneer on exterior walls?
To install flexible thin stone veneer on exterior walls, first prepare a clean, flat, sound substrate. Apply the specified primer or back coating to the veneer and keep the primed material out of direct sunlight. Once it reaches the required condition, spread a compatible exterior-rated tile adhesive evenly over the wall using the recommended notched trowel. Position the veneer, compact it to achieve full-bed contact, and remove residue at the correct stage. Finally, protect exposed top and perimeter edges using the approved edge-sealing and flashing details. Always follow the product-specific installation instructions.
2. Can flexible thin stone veneer be used outdoors in rain, sun, and freezing temperatures?
Some flexible thin stone products are designed for exterior applications, but not every product is suitable for every climate. Before installation, confirm that the veneer, backing, primer, adhesive, and complete wall assembly are approved for the expected exposure. Direct sunlight can cause freshly primed material or applied adhesive to dry too quickly, so protect the work during installation. In rainy or freezing conditions, follow the specified curing and temperature limits. In areas with severe weather, freeze-thaw cycles, or strong wind, obtain written installation guidance and verify local building requirements.
3. What adhesive is best for flexible thin stone veneer walls?
The best adhesive depends on the veneer backing, substrate, installation location, and environmental exposure. For compatible systems, a high-performance cementitious tile adhesive classified as C2 under EN 12004 may be recommended, sometimes with additional deformability requirements. A C2 classification by itself does not guarantee compatibility with every thin stone product. Ask the manufacturer to confirm the exact adhesive and primer combination, required trowel notch, coverage, open time, and curing conditions. Avoid substituting general construction glue or structural adhesive without written approval for the intended application.
4. Why does flexible thin stone veneer peel off exterior walls?
Peeling or debonding can result from several factors, including an improperly prepared substrate, incompatible primer or adhesive, insufficient adhesive coverage, installation over adhesive that has skinned over, or inadequate curing conditions. Direct sunlight on primed veneer can also compromise the intended bonding process if the coating dries outside the manufacturer's recommended conditions. Water entering through exposed edges or poorly detailed wall openings may contribute to deterioration. To reduce these risks, prepare the wall correctly, protect primed sheets from direct sun, check adhesive contact during installation, and provide appropriate edge protection, flashing, and drainage.
5. How can I choose a reliable flexible thin stone veneer manufacturer or factory for wholesale orders?
When choosing a flexible thin stone veneer manufacturer or factory, look beyond the initial quotation. Request current technical data sheets, installation instructions, product construction details, relevant performance test reports, and clear recommendations for primer and adhesive. Ask about quality-control procedures, batch consistency, packaging, lead times, sample approval, and wholesale order requirements. If you plan to use the material on exterior walls, obtain written confirmation of its suitability for the intended application and climate. A supplier that provides practical technical support and consistent documentation can help reduce installation risks and make repeat orders easier to manage.